
Fitness
Isha Kriya: A Complete Guide to the Guided Meditation in 2026


Isha Kriya is a guided meditation practice created by Sadhguru and offered through the Isha Foundation. It is designed as a simple introduction to yogic meditation that can be practiced by people without extensive previous experience. Unlike practices that focus mainly on physical yoga postures, Isha Kriya focuses on breath, awareness, thought, and stillness. The official Isha materials describe it as a practice intended to help an individual connect with the source of existence and develop greater clarity, peace, wellbeing, and dynamism.
One reason Isha Kriya continues to attract attention in 2026 is its relatively short practice time. Official instructions describe the complete process as taking approximately 12 to 18 minutes, while the current Isha website presents it as a meditation that can fit easily into everyday life. It is also available as a guided practice, making it accessible to beginners who may not know how to meditate independently.
What Is Isha Kriya?
The name Isha Kriya comes from two Sanskrit-derived terms used in the Isha tradition. According to the official explanation, “Isha” refers to that which is the source of creation, while “kriya” means internal action. The practice therefore centers on turning attention inward rather than depending primarily on external activity.
Isha Kriya was created by Sadhguru as a meditation process that could be made available to a broad audience. The official Isha website describes it as rooted in the yogic sciences and emphasizes that it can be practiced in the comfort of one’s home. It does not require a complicated setup, extensive equipment, or advanced physical flexibility.
For beginners, this simplicity is an important feature. The practice combines mental awareness, controlled breathing, a specific vocal sound, and a period of sitting quietly. Rather than treating meditation as simply an attempt to stop thinking, the process provides specific points of attention throughout the session.
How Does Isha Kriya Work?
The traditional instructions divide Isha Kriya into three stages. The first stage combines gentle breathing with specific mental statements. During inhalation, the practitioner mentally repeats “I am not the body,” and during exhalation, the practitioner mentally repeats “I am not even the mind.” The official instructions recommend continuing this portion for approximately 7 to 11 minutes.
The second stage introduces the long “A” sound, pronounced similarly to the “a” in “father.” According to the instructions, the sound is produced seven times, with each repetition taking place during an exhalation. Isha’s materials associate this sound with the body’s manipuraka or maintenance center.
The third stage is a period of quiet sitting and awareness. The official instructions describe sitting for approximately five to six minutes with the face slightly upturned and a mild focus between the eyebrows. The complete practice is generally described as lasting 12 to 18 minutes.
For anyone learning the practice for the first time, following the official guided meditation is preferable to improvising the sequence. The Isha Foundation provides guided material and downloadable instructions so that beginners can become familiar with the process.
What Are the Benefits of Isha Kriya?
The official Isha sources associate regular Isha Kriya practice with several areas of wellbeing, including clarity, focus, energy, peace, and a greater sense of wellbeing. The stated purpose is also connected with developing clarity of perception and creating greater distance between one’s sense of self and identification with the body and mind.
It is important to distinguish these traditional claims from established medical treatment. Isha Kriya is a meditation practice, not a substitute for professional medical or mental-health care. People may experience meditation differently, and individual experiences should not automatically be interpreted as medical outcomes.
For everyday life, meditation can nevertheless provide a structured period in which a person steps away from constant distractions. A short routine may help someone create a regular pause during a busy day, particularly when studying, working, or managing a demanding schedule. The official Isha material specifically presents Isha Kriya as a tool for dealing with the pace of modern life.
Who Can Practice Isha Kriya?
According to the official Isha Kriya FAQ, people aged 12 and above can practice Isha Kriya. The practice is designed to be accessible and does not depend on advanced yoga experience.
The standard instructions describe a cross-legged sitting position with the spine comfortably erect. However, the official FAQ states that people who cannot sit cross-legged can practice while seated on a chair, with the legs crossed at the ankles as instructed.
The environment does not have to be perfectly silent. A quiet location can make concentration easier, but the official guidance says that the practice can be performed in different environments as long as the practitioner is not physically disturbed during the session.
How Often Should You Practice Isha Kriya?
Consistency is a central part of the Isha Kriya approach. Official instructions state that the practice can be done twice daily for 48 days, described as a full mandala or cycle, or once daily for 90 days. The official FAQ also notes that people who cannot follow those schedules can practice as often as possible.
The most practical approach for a beginner is to establish a manageable routine rather than treating meditation as something that must be done perfectly. Choosing a regular time can make it easier to remember the practice. Isha’s FAQ says it can be practiced at a convenient time, while recommending that practitioners avoid doing it around midnight.
An empty stomach is not mandatory, although the official FAQ notes that practicing immediately after a full meal may make someone feel sleepy.
Isha Kriya in 2026: Online Access and Beginner-Friendly Practice
In 2026, one of the most convenient aspects of Isha Kriya is its online accessibility. The Isha Foundation offers a free guided meditation with instructional material, allowing people to learn the basic process without needing to attend a lengthy course. The official website also indicates that Isha Kriya is available in multiple languages and through guided sessions.
This accessibility makes Isha Kriya particularly suitable for people who are searching for a short meditation routine that can become part of an existing daily schedule. Instead of requiring specialized equipment, the practice primarily requires a suitable place to sit and enough uninterrupted time to complete the process.
Beginners should follow the official instructions rather than modifying the breathing, sounds, or sequence based on random online advice. If a person has a health concern or experiences discomfort while practicing, discussing the situation with an appropriate healthcare professional is sensible.
Final Thoughts on Isha Kriya
Isha Kriya is a short, structured meditation practice developed by Sadhguru and offered through the Isha Foundation. Its three-part structure combines breath awareness, mental focus, the “A” sound, and quiet sitting, creating a straightforward routine for people interested in exploring meditation and yogic practices. Official Isha materials describe the practice as taking approximately 12 to 18 minutes and associate regular practice with clarity, focus, peace, energy, and wellbeing.
For someone exploring meditation in 2026, its main practical feature is simplicity. It can be practiced at home, does not require advanced yoga postures, and is supported by free guided resources. As with any meditation technique, individual experiences can differ, so it is best approached as a consistent mindfulness and yogic practice rather than as a guaranteed treatment for a particular health condition.
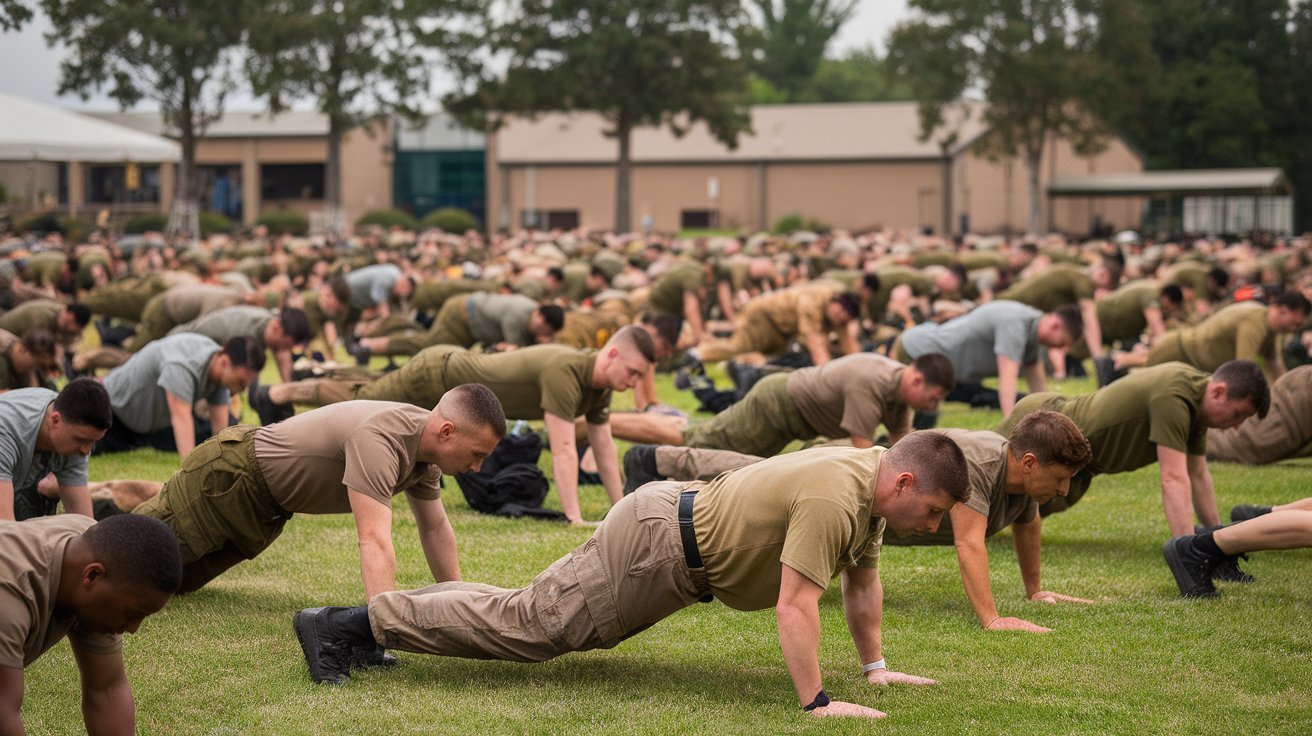
Foundation Training is a movement and exercise method designed to improve body awareness, posture, strength, stability, and movement patterns through intentional positions and controlled breathing. Developed by Dr. Eric Goodman, the method has become widely known for exercises that emphasize the posterior chain, hips, feet, core, and the relationship between breathing and movement. Unlike traditional gym routines that often isolate individual muscles, Foundation Training encourages the body to work as a connected system.
In 2026, Foundation Training continues to provide guided programs, individual workouts, educational resources, and instructor certification. Many of the exercises require little or no equipment, making the method accessible for people who want to practice movement at home or in other suitable spaces. The approach centers on principles such as decompression, anchoring, posture, intentional muscle engagement, and controlled breathing.
What Is Foundation Training?
Foundation Training is a corrective exercise and movement system that teaches people to create length, stability, and stronger muscular support through specific positions and breathing techniques. Rather than focusing entirely on one muscle or joint, the method encourages coordinated movement across multiple parts of the body.
The official Foundation Training program describes its approach as targeting movement patterns, muscle imbalances, body alignment, joint stability, posture, and overall movement quality. Exercises are designed to encourage greater awareness of how the feet, hips, posterior chain, spine, and breathing mechanics work together.
A major concept is that movement quality matters. Instead of simply increasing repetitions or making an exercise more difficult, practitioners are encouraged to develop control, awareness, and consistency. This makes Foundation Training different from exercise programs focused primarily on lifting heavier weights or performing high-intensity workouts.
The Core Principles of Foundation Training
The Foundation Training method is built around several important concepts. One of the best-known is Decompression Breathing, which combines posture and breathing with intentional muscular engagement. Another central principle is anchoring, which focuses on creating stability through the feet, hips, and surrounding muscle chains.
The method also uses ideas related to integration and movement patterns. Instead of treating the body as separate sections, Foundation Training encourages coordinated movement. Exercises may involve hinging at the hips, engaging the posterior chain, maintaining controlled alignment, and using breath to support the position.
The official exercise materials include movements such as Anchoring, decompression positions, hip-hinge patterns, bridges, squats, planks, and the well-known Founder exercise. These movements can vary in difficulty, allowing people to begin with foundational positions before exploring more challenging variations.
Foundation Training Exercises and the Founder Movement
The Founder is one of the most recognizable exercises associated with Foundation Training. It is based on a controlled hip-hinge position and is intended to encourage coordinated engagement throughout the posterior chain while maintaining intentional body positioning.
Other exercises used within the method include Anchored Back Extension, Anchored Bridge, Integrated Hinge, Kneeling Founder, Forward Fold, Foundation Training Squat, Woodpeckers, and the Eight-Point Plank. These exercises appear within the Foundation Training certification curriculum and educational materials.
A Foundation Training session may also include breathing-focused positions, standing movements, floor exercises, and controlled mobility work. The exact combination depends on the person’s experience and the particular program being followed.
Because technique is important, beginners can benefit from guided instruction rather than attempting advanced positions immediately. The official program recommends starting with its foundational material and moving at a pace that allows the practitioner to understand the cues and become familiar with the positions.
Potential Benefits of Foundation Training
People are often interested in Foundation Training because of its focus on strength, posture, movement awareness, balance, and stability. The program is designed to help participants develop more intentional movement patterns rather than relying only on isolated muscle training.
Athletes may use the principles as part of a broader approach to movement preparation and body awareness. The official Foundation Training website describes applications related to performance, recovery, movement patterns, and physical sustainability.
For everyday movement, the principles can also be applied to activities such as standing, sitting, bending, and lifting. The goal is to develop greater awareness of body positioning and muscular support during ordinary movements rather than treating exercise as something completely separate from daily life.
Results will vary between individuals, and exercise should not be treated as a guaranteed cure for pain or injury. Anyone with an injury, persistent pain, dizziness, or another medical concern should seek appropriate guidance before beginning or modifying an exercise routine.
How Beginners Can Start Foundation Training
A beginner should focus first on understanding the basic principles of breathing, posture, anchoring, and controlled movement. Starting with easier positions can provide a foundation before progressing to more complex exercises. The official FT Streaming guidance recommends beginning with its “Build Your Foundation” material to learn the core tools used throughout the method.
The quality of each repetition is generally more important than trying to perform a large amount of exercise. A movement should feel controlled and purposeful. According to Foundation Training’s support guidance, practitioners may notice muscular work in areas such as the glutes, hamstrings, back line, feet, hips, and breathing muscles, but sharp pain, numbness, dizziness, or other unsafe symptoms are signals to stop or choose a gentler option.
For teenagers and beginners, a sensible approach is to prioritize learning technique, maintaining control, and building consistency rather than attempting difficult positions or extreme training sessions. A qualified instructor can also provide feedback on form and suitable exercise modifications.
Foundation Training, Strength, and Everyday Movement
Foundation Training can complement other forms of physical activity because it emphasizes movement awareness rather than replacing every other type of exercise. Walking, sports, age-appropriate strength training, and other activities can all have different roles in a balanced lifestyle.
The method’s focus on the posterior chain is particularly notable. This term generally refers to muscles along the back of the body that contribute to activities involving standing, hip movement, and body support. Foundation Training exercises often encourage these muscles to work together with the hips, feet, trunk, and breathing mechanics.
The official program also emphasizes that greater intensity is not always better. Better control and clearer awareness can be more valuable than simply pushing harder.
This principle can make Foundation Training appealing to people who prefer deliberate movement over highly competitive or equipment-heavy workouts.
Foundation Training Programs and Instructor Certification in 2026
In 2026, Foundation Training offers digital programs, guided workouts, and a network of instructors. The official streaming platform includes programs, protocols, calendars, individual workouts, and community resources, while the Find a Trainer directory helps users locate certified instructors for online or in-person guidance.
The Foundation Training certification pathway includes online education, an in-person skills-training component, student teaching, and a final skills assessment. The curriculum covers topics such as Decompression Breathing, Anchoring, Integration, the nervous system, movement patterns, and program planning.
For people interested only in personal exercise, certification is not necessary. Guided beginner programs may be a more appropriate way to become familiar with the method.
Conclusion
Foundation Training is a movement-based exercise method that combines breathing, posture, anchoring, hip movement, posterior-chain engagement, and controlled exercise. Its best-known movements, including the Founder, are part of a broader system designed to encourage stronger support and greater awareness of how the body moves.
In 2026, Foundation Training remains accessible through guided digital programs and certified instructors. The most effective approach is to begin with the fundamentals, focus on proper control rather than intensity, and progress gradually. For anyone exploring a new movement routine, consistency, good technique, and appropriate professional guidance when needed provide a stronger foundation for long-term physical activity.

Isha Kriya: A Complete Guide to the Guided Meditation in 2026

Takashi Morinozuka: Biography, Personality, Role, and Legacy in Ouran High School Host Club

Chevy Hybrid SUV in 2026: Models, Alternatives, Electric Options, and What to Know

Samantha Struthers Rader: Biography, Career, Family, and the Inspiring Journey of Dr. Sam

Stacie Zabka: Everything You Need to Know About William Zabka’s Wife

Ryan Kiera Armstrong: Biography, Movies, TV Shows, Career, Family, and Latest Updates (2026 Guide)
 News3 months ago
Samantha Struthers Rader: Biography, Career, Family, and the Inspiring Journey of Dr. Sam
- celebrity3 months ago
Stacie Zabka: Everything You Need to Know About William Zabka’s Wife
- celebrity2 months ago
Ryan Kiera Armstrong: Biography, Movies, TV Shows, Career, Family, and Latest Updates (2026 Guide)
- celebrity2 months ago
Brecken Merrill Parents: Everything About His Family Background, Childhood, and Support System
- celebrity2 months ago
Imogen Lucie Age: Biography, Career, Height, Family, Net Worth, and Social Media (2026 Guide)
- celebrity2 months ago
Priscilla Love Vanwinkle: Biography, Background, Family Connections, and Personal Story
- celebrity3 months ago
Caleb James Goddard: Everything You Need to Know About Jack Nicholson’s Son
- celebrity2 months ago
Moses Hacmon Net Worth: Biography, Career, Income Sources, and Financial Overview in 2026